Maps are created with "Composers" in QGIS.
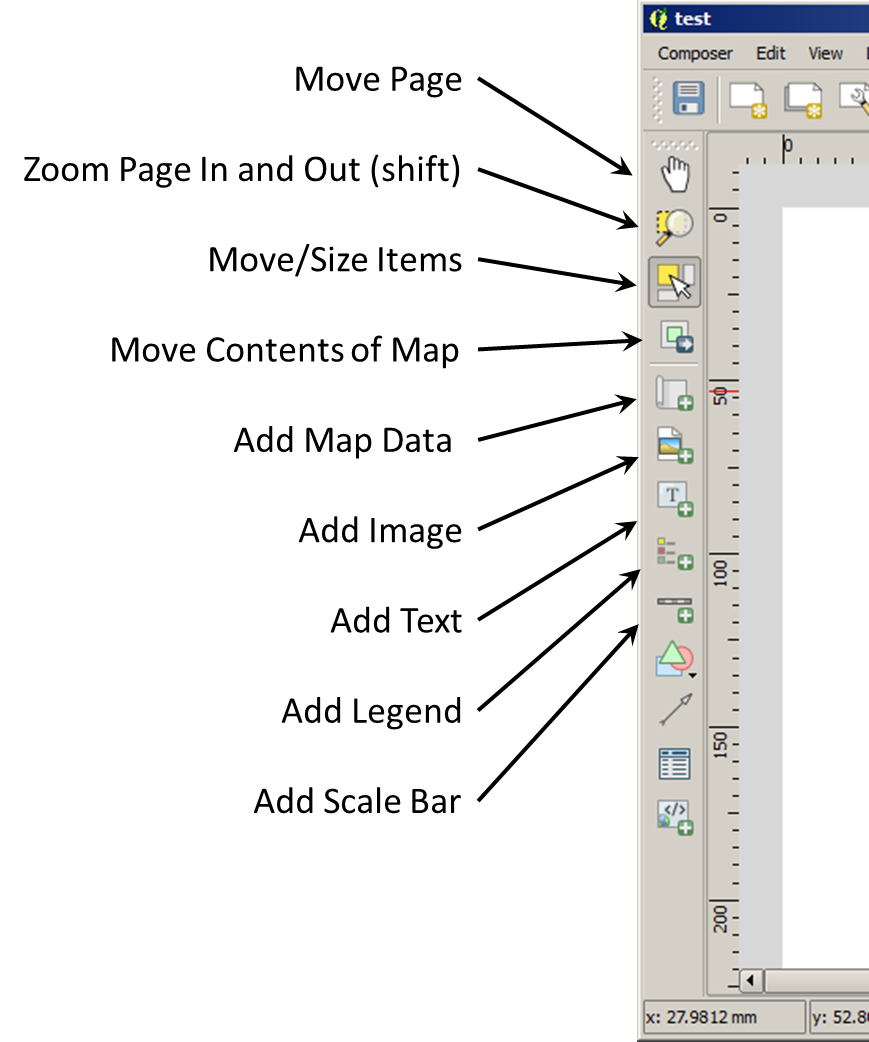
Along the left side of the composer window you'll see a series of icons. These are the main tools that you'll be using to create your map. Spend some time with them now until you have added and moved the standard cartography elements: Spatial data, legend, scale bar, a title, some text for credits. You'll also want to get comfortable zooming in and out and moving the page around and moving your spatial data within a frame.
Note: For now, you'll want to add a north arrow as an image as I have not figured out how to add a north arrow to a map.
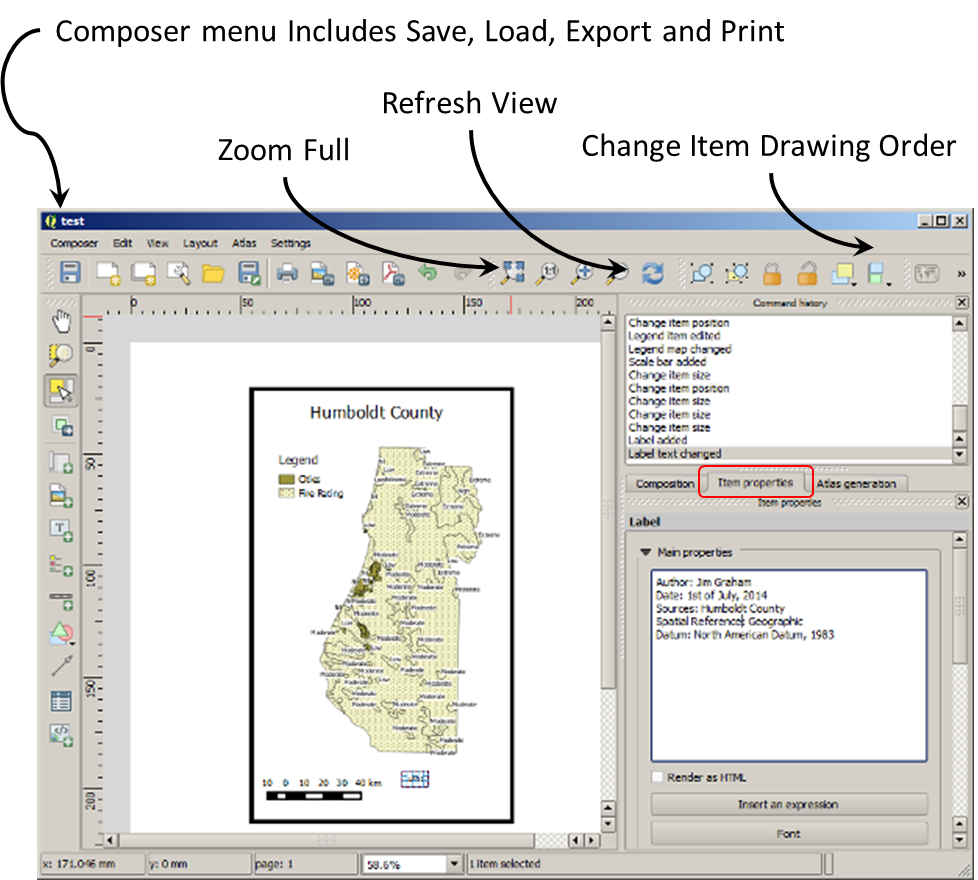
You'll want to be able to edit the text in "labels" and change the "properties" for other items. Click on an item with the arrow (move/size items) and then click on the"Properties" tab on the right (see the image below). Try changing settings here to modify your text and other items.
Along the top of the composer window, you'll see some additional icons that are important. Use "Zoom Full" to see your entire document, "Refresh View" will redraw the map as sometimes the map does not redraw properly. "Change Item Drawing Order" allows you to move items on top of other items. When you are ready, you'll want to save your map as a "template" and then print it.
© Copyright 2018 HSU - All rights reserved.